Reviewed · STIRLING TOURS
Braveheart (Battle of Stirling Bridge) Tour
The old wooden bridge that helped shape Scotland’s victory at Stirling in 1297 is gone. On this short outdoor tour, guide Steven helps you picture where it stood, how it fell during the battle, and why the ground around Stirling Bridge matters to the story of William Wallace and Andrew de Moray.
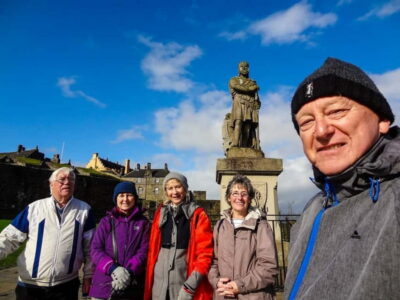
I like two things in particular: the small group limit of 15, which leaves room to ask questions, and Steven’s use of a tablet to show details of the vanished bridge. He also talks through competing ideas about its location, rather than treating the familiar film version as settled history.
The main consideration is that this is an outdoor talk, not a visit to a preserved battlefield display. There is little walking, but you will stand for a while, and the original bridge is no longer there to see.
- The battle site is the subject: Learn where the old wooden bridge stood and where it collapsed in 1297.
- Wallace shares the story: Andrew de Moray is also central to the account of Scotland’s victory.
- The group is capped at 15: A small format makes questions and conversation easier.
- Steven uses visual aids: A tablet helps show details that are hard to picture from the present-day site.
- Expect a brisk outdoor visit: Plan for about an hour to 1 hour 15 minutes, with some standing.
At Stirling Bridge, the missing bridge is the point
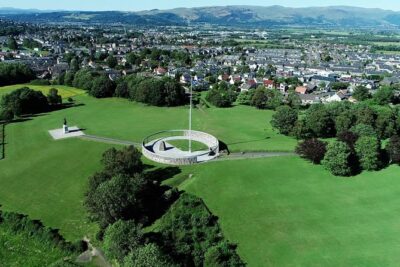
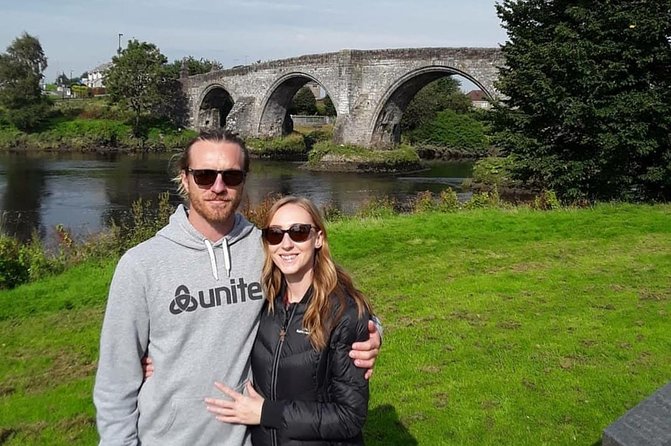
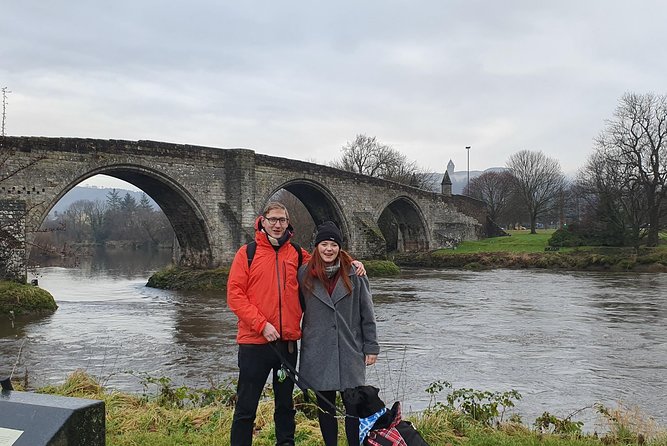
The tour meets on Laurencecroft Road, by Stirling Old Bridge and the River Forth. That puts you close to the place where the 1297 story unfolded, but don’t expect to find the battle’s wooden bridge still standing. The present-day site offers no clear remnant of it; understanding its position depends on the guide’s explanation and visual aids.
That absence is part of what makes the walk useful. A battle site can be hard to read when its key feature has vanished, and the modern setting does not automatically explain how the crossing shaped events. Steven uses a tablet to show details of the original bridge and help you imagine where it stood.
He also discusses different theories about the bridge’s location, including ideas that take newer information into account. That approach is a strength for anyone who wants more than a neat, simplified version of the tale. You hear what is known, what is debated, and how the setting fits the account.
There is a personal touch to the guide’s interest in the bridge. Steven and his father built a model of the original wooden structure in their garden. That detail gives you a sense of the care behind his research, though you should not assume the model is part of the tour itself.
Wallace and Andrew de Moray take the lead
It is easy to let William Wallace dominate any account of Scotland’s Wars of Independence. This tour also gives Andrew de Moray a place in the story, presenting the two men as leaders of the victory at Stirling Bridge and explaining how they came to the forefront of Scottish history.
The focus is not only on the battle’s best-known moment. The tour covers the men’s early lives, the events that brought them into the struggle, their deaths, and the legacy associated with them. That wider arc helps put the battle in context, especially if your knowledge begins and ends with Wallace as shown in Braveheart.
The guide’s tone is warm and personal, but the subject is serious. You can ask questions, hear details beyond the familiar version, and get a clearer sense of why the battle matters in Scotland’s story. Steven’s enthusiasm is especially suited to people who already have an interest in history and want to explore the facts behind the popular image.
There is also a light joke in the tour’s description about Andy Murray. It is a playful way to catch your attention, not a promise that the tennis player is part of the historical account. The main subjects remain Wallace, de Moray, and the 1297 victory.
Other tours people book in Edinburgh:
- Edinburgh: Loch Ness, Glencoe & the Scottish Highlands Tour
★ 4.6 · 17,446 reviews - From Edinburgh: Loch Ness, Glencoe & Scottish Highlands Tour
★ 4.7 · 11,381 reviews - The World Famous Underground Ghost Tour
★ 4.5 · 9,272 reviews
Braveheart is a starting point, not a history lesson
The tour’s name may draw you in if you know the film, but it is best approached as a chance to separate popular storytelling from the history of Stirling Bridge. The film’s influence is part of the appeal, yet Steven’s aim is to explain the battle itself and correct familiar misconceptions.
That distinction matters because a screen version can compress events, simplify people, and turn a complicated conflict into a clean story of heroes and villains. Here, the emphasis is on what happened at the bridge, how the site is understood, and the roles played by Wallace and de Moray. Steven also considers alternate explanations and locations rather than asking you to accept every old tale at face value.
If you have watched Braveheart, you will likely find the contrast especially engaging. If you have not, the tour still works: the essential context is Scotland’s fight for independence and the battle’s place within it. You do not need prior knowledge to follow along, though an interest in history will help you get the most from the discussion.
A compact walk with time to ask questions
The tour lasts about 1 hour to 1 hour 15 minutes. That is enough time for a focused introduction to the battle without taking over your day in Stirling. It can fit well before another activity, or give you context before exploring more of the area on your own.
There is not much walking, but you should expect to stand while Steven explains the site. Wear shoes and clothing that suit an outdoor visit, and be ready for the weather rather than assuming the tour will be sheltered. Poor weather can lead to a different date or a full refund if the activity is canceled.
A maximum group of 15 keeps the experience from feeling like a crowd gathered around a distant speaker. If the group is small, you may have more room to ask questions and follow a topic that interests you. The format can also feel personal: Steven’s hospitality and willingness to share his enthusiasm are an important part of the visit.
The tour is offered in English, and a mobile ticket is provided. It begins and ends at the meeting point, so you do not need to arrange separate transport between the start and finish. The meeting location is listed as Stirling Old Bridge, near the River Forth, with Laurencecroft Road given as the meet-up address. Check your booking details so you know exactly where to gather.
What $34.45 buys you
At $34.45 per person, this is a short specialist tour rather than a full-day outing. Its value rests on the guide’s interpretation: the bridge is gone, so you are paying for someone to explain its likely position, show you visual details, and place the battle in its historical setting.
That can be worthwhile if you want to understand why the site matters instead of simply walking past it. A tablet showing the old bridge’s details can make a difference when the physical evidence is no longer visible, and the small group gives you a better chance to ask questions than a large coach tour would.
The price may feel less compelling if you want a long, broad survey of Stirling or an indoor collection of objects. The visit concentrates on one battle and its key figures, and it lasts roughly an hour. It is most useful as a focused addition to a day in Stirling, not a substitute for a wider visit to the city.
The tour is often booked around three weeks ahead, with an average lead time of 22 days. If your dates are fixed, booking ahead is sensible. You can cancel for a full refund up to 24 hours before the start; changes or cancellations inside that window are not accepted for a refund. If poor weather forces the tour to be canceled, you can choose another date or receive a full refund.
Same city, a different kind of day:
- Underground Vaults Walking Tour in Edinburgh Old Town
★ 4.5 · 8,506 reviews - Loch Ness, Scottish Highlands, Glencoe and Pitlochry Tour
★ 5.0 · 6,854 reviews - Loch Ness & Highlands Small-Group Tour from Edinburgh with Cruise
★ 4.5 · 6,022 reviews - Edinburgh Castle: Guided Walking Tour with Entry Ticket
★ 5.0 · 5,540 reviews
Who will get the most from this tour
I would choose this walk if you care about Scottish history, want to understand the Battle of Stirling Bridge, or are curious about how Braveheart differs from the historical account. It also suits you if you prefer a small group and an engaging guide over a self-guided stroll with no explanation.
It can be a good choice for a short visit because it is focused and does not involve much walking. Still, account for standing time, and remember that the experience is outdoors. The tour is described as suitable for most people, and service animals are allowed.
If you are looking for a detailed tour of every major Stirling landmark, this is too narrow. Its subject is the battle, the missing bridge, and the people tied to the victory. Pair it with another attraction or history tour if you want a broader picture of the area.
Should you book the Stirling Bridge tour?
Book it if you want the battle explained at the site, value a guide who can make a vanished bridge easier to picture, and are interested in Wallace and de Moray beyond the film version. Steven’s tablet, discussion of competing location theories, and personal approach give the short visit substance.
Skip it if you want a long walking route, indoor exhibits, or a site where the original bridge remains visible. For $34.45, the best reason to go is the interpretation, not the physical remains. If that is what you are after, this is a compact, personal way to make sense of one of Scotland’s most important battles.
FAQ
How long does the tour last?
It lasts about 1 hour to 1 hour 15 minutes.
Where does the tour start and finish?
It starts near Stirling Old Bridge, with Laurencecroft Road given as the meeting address. It ends back at the meeting point.
What is the price?
The listed price is $34.45 per person.
How many people can join?
The tour has a maximum group size of 15.
What language is the tour offered in?
The tour is offered in English.
Which historical figures are covered?
The tour focuses on William Wallace and Andrew de Moray, including their roles in the Wars of Independence, their deaths, and their legacy.
Can I see the original wooden bridge?
No. The old wooden bridge is no longer there. The guide uses a tablet to show details of where it stood and explains where it collapsed during the battle.
What happens if the weather is poor?
If poor weather causes the tour to be canceled, you will be offered another date or a full refund.
Newest tours in Edinburgh
- Scotland: West Highlands, Mull and Iona 4-Day Tour★ 4.5 · 13 reviews
- From Edinburgh: Isle of Skye and Outer Hebrides 6-Day Tour★ 4.9 · 17 reviews
- From Edinburgh: Outer Hebrides & Isle of Skye 6-Day Tour★ 4.7 · 33 reviews
- 8-Day Orkney Skye and Highlands Tour from Edinburgh★ 4.5 · 23 reviews
- 5-Day Orkney and Highlands Tour from Edinburgh★ 5.0 · 23 reviews
- Bannockburn Battlefield Tour★ 5.0 · 36 reviews
- 5-Day York, Lake District & Hadrian’s Wall Tour from Edinburgh★ 4.5 · 13 reviews
- A History of Witchcraft in Edinburgh: A Self-Guided Audio Tour★ 5.0 · 3 reviews
Stirling Tours, compared.
Stirling Old Town Daily Walking Tour (11am & 2pm)
Read our review →